In this article I describe how I created a synthetic flower which shows the current state of the solar power battery of our house in a playful way.
Flower Power
Meet Flower Power: a quirky, physical gadget that indicates your home’s solar battery charge level. A 3D-printed plant sits in a flower pot and spins around to either show off a happy or a sleepy face, depending on how much sunshine juice is currently stored.
Smart Home Monitoring with Home Assistant
About a year ago, I joined the Photovoltaics Club by installing solar panels on my roof. They convert sunlight into electricity, which then gets stashed in a battery for later use. Like most setups, the monitoring system that tells you how full your battery is lives in the basement. Luckily, I don’t have to jog downstairs every time I wonder if there’s enough power for the dishwasher. Modern smart home solutions let you check this information via a computer or smartphone.
Let’s take a quick look at how it’s integrated with Home Assistant. Below, you can see a typical pattern of day vs. night, sunshine vs. darkness:
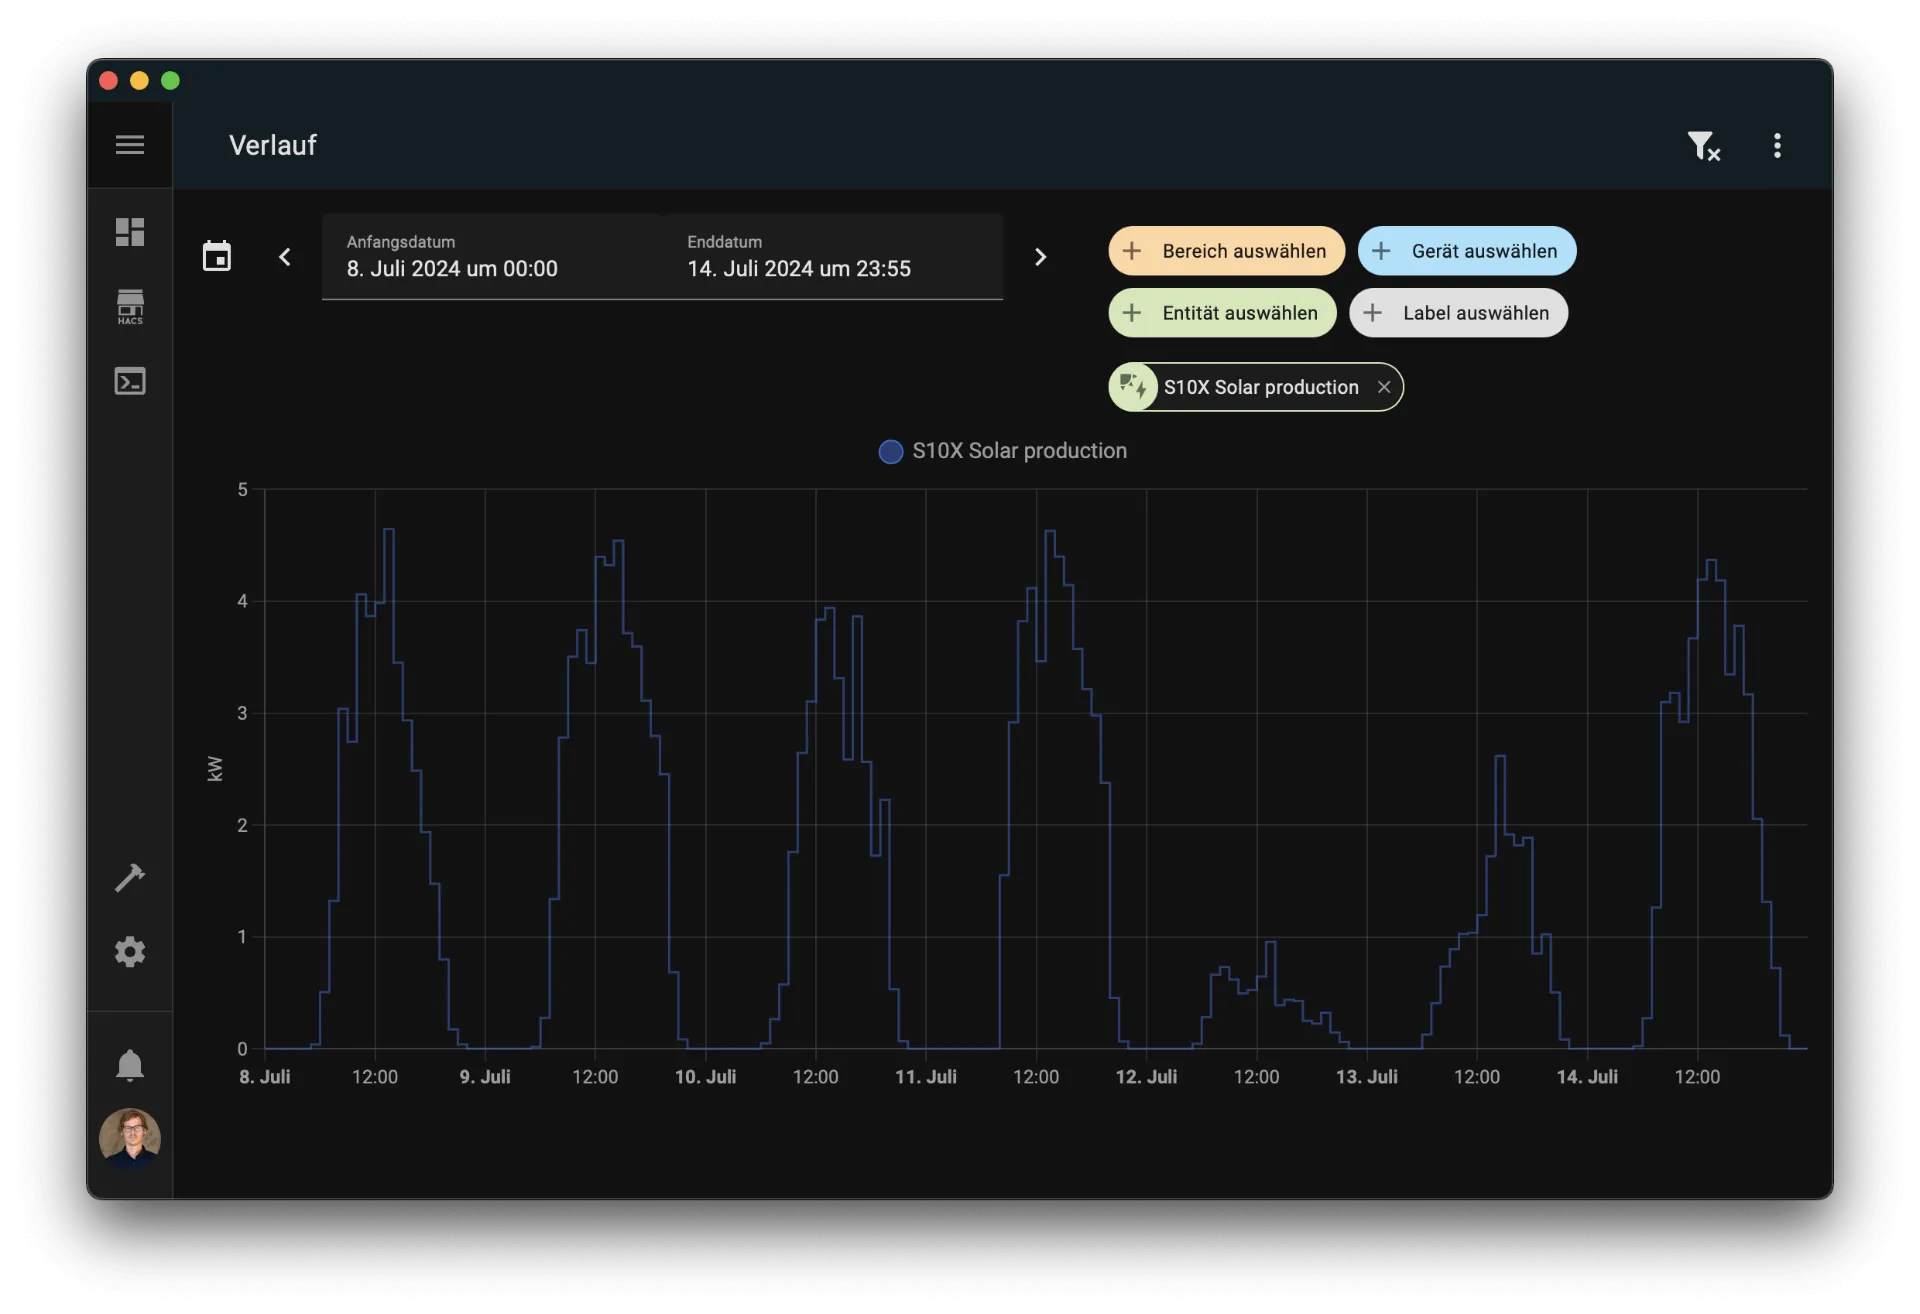 I remember July 12 as if it was my birthday…
Here’s a week full of sun—except for July 12, which saw nonstop rain. During bright days, the battery soaks up excess solar power and then releases it at night for things like hot water or floor heating. On those long, sunny days, there’s usually more leftover juice by the end of the night. On that rainy July 12, though, the battery completely drained and only got recharged the next day when the sun finally showed up.
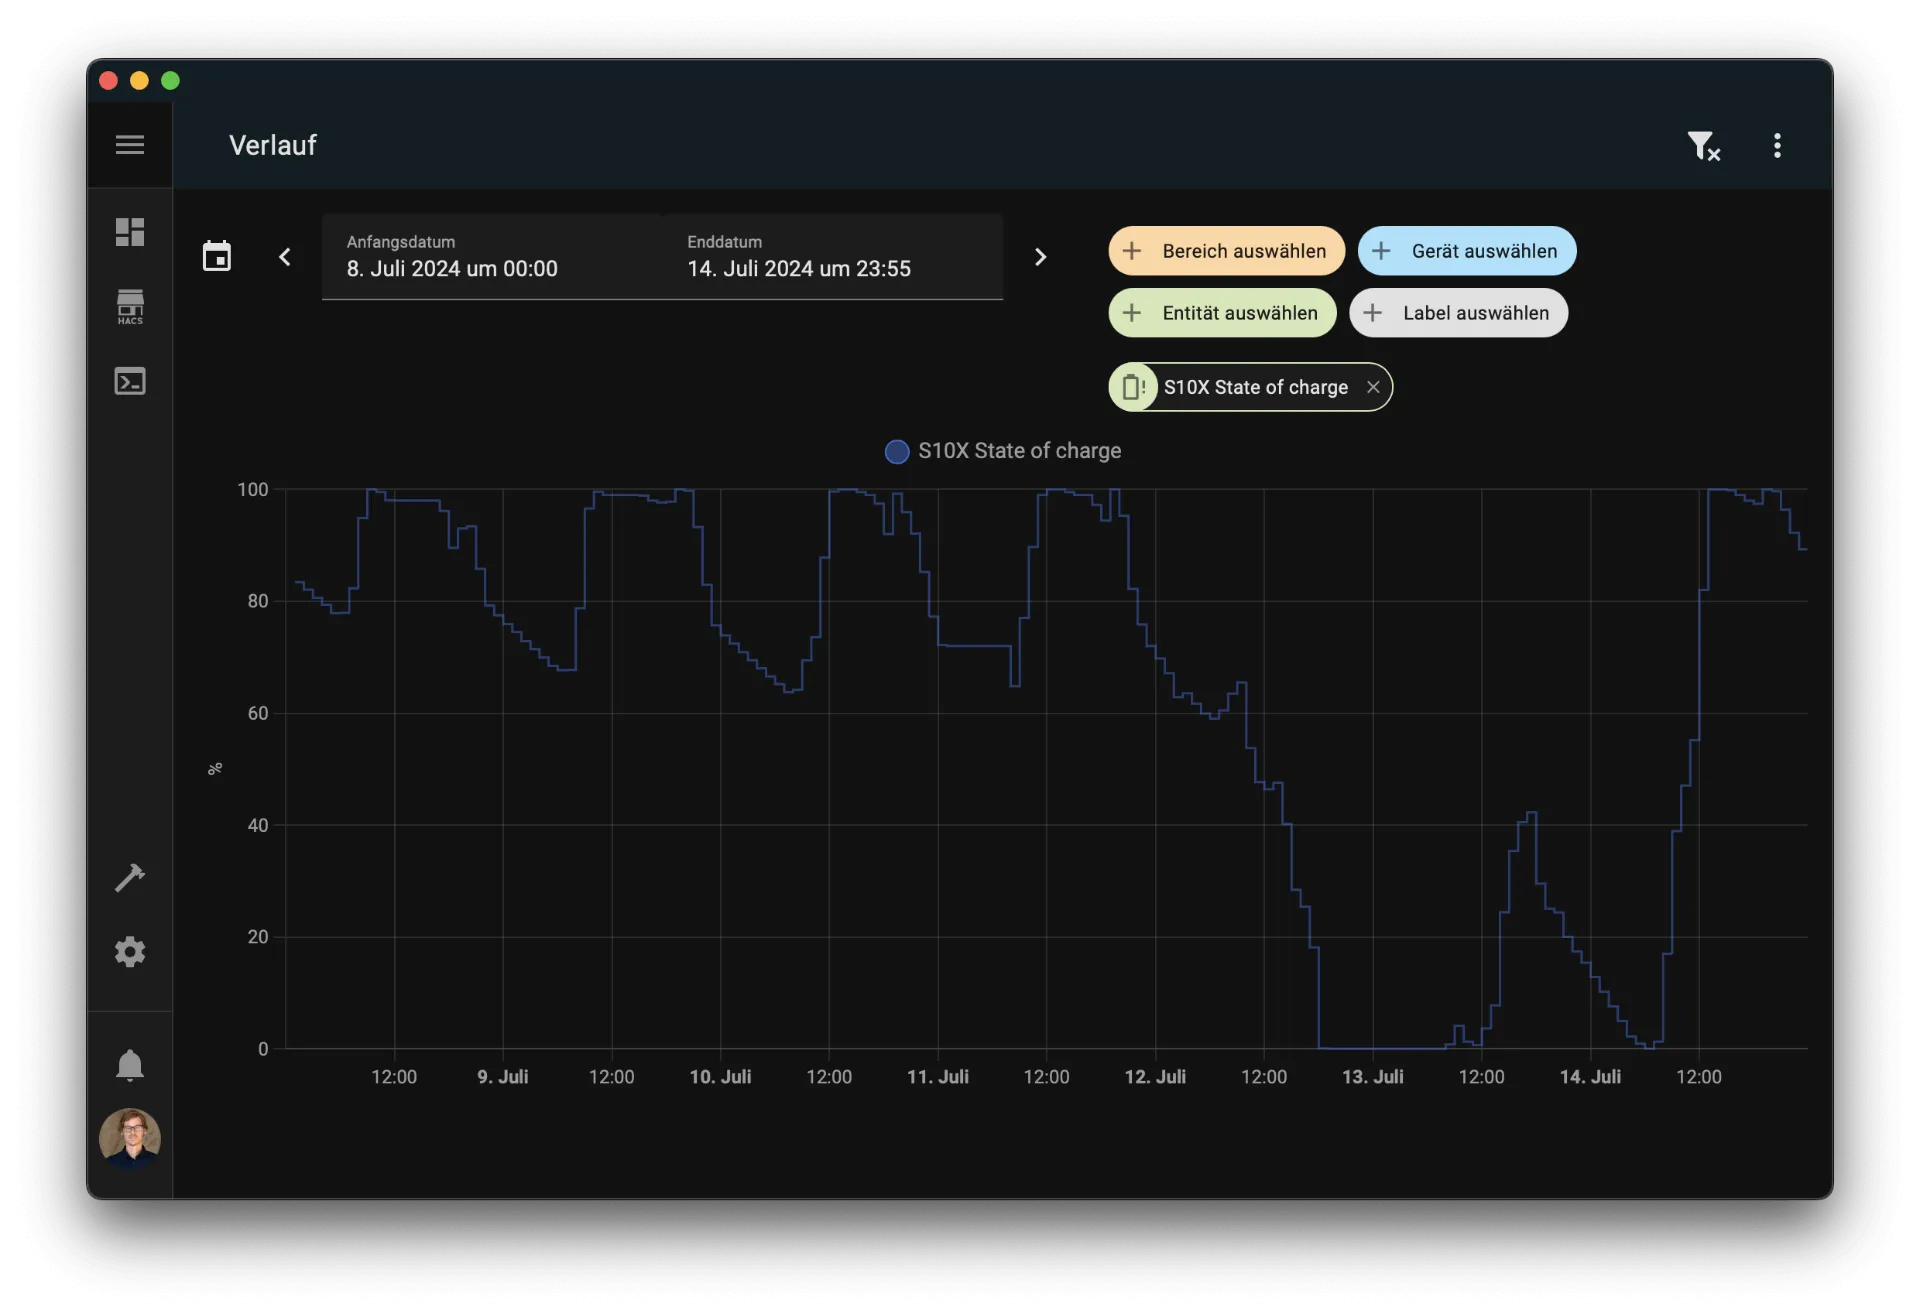 Both the battery and I hovered around 0% energy for the better part of the day.
With Home Assistant (or similar commercial options), it’s easy to keep tabs on how much power your household is using in real time. But opening an app, clicking through menus, and hoping you picked a good time to run the dishwasher (so you’re not buying extra electricity from the grid) can be a hassle. Plus, not every family member has access to the smart home system—or the desire to figure it out.
From Digital to Analog
I’m fascinated by the idea of blending modern technology with everyday objects, making the digital tangible and more… well, real. We already spend a huge chunk of our day glued to screens. Now, even turning on the living room lamp has gone “smart,” which often means pulling out a phone instead of simply flipping a switch like we’ve done for the last hundred years.
One of the biggest challenges in building physical gadgets with always-on connectivity is power consumption. But if you can get that consumption low enough so that your device can run for days or weeks without a recharge, it takes on an almost magical air.
The Power Plant
Enter the ESP32 microcontroller: it’s a dream come true for low-power projects. It’s far more efficient than, say, a Raspberry Pi, yet it still has Wi-Fi, Bluetooth, a bunch of I/O pins, and an enormous community offering libraries for just about any purpose. The ESP32 also has a sleep mode that sips electricity, waking up only at preset intervals to run whatever code you’ve stored in its flash memory.
For displaying the battery charge without burning power, a continuously lit LED display was a no-go (LEDs would drain a small battery in just a few days). Instead, I used a tiny servo motor—commonly found in kids’ electronics kits—that can rotate up to 180 degrees in either direction based on a control signal. Once positioned, it stays put without using more power, making it ideal for showing a battery’s state of charge at intervals rather than in real time.
Less power consumption means a happier planet (and a friendlier electricity bill), so I chose a flower theme: the 3D-printed bloom turns inside its pot based on the battery’s fill level. After trying out various materials (and a few fails), I ended up modeling the flower in Blender and printing it. It’s not as cute as I’d hoped, but it gets the job done.
A quick trip to the hardware store for a flowerpot and some decorative bits, and voilà—my parts list was complete.
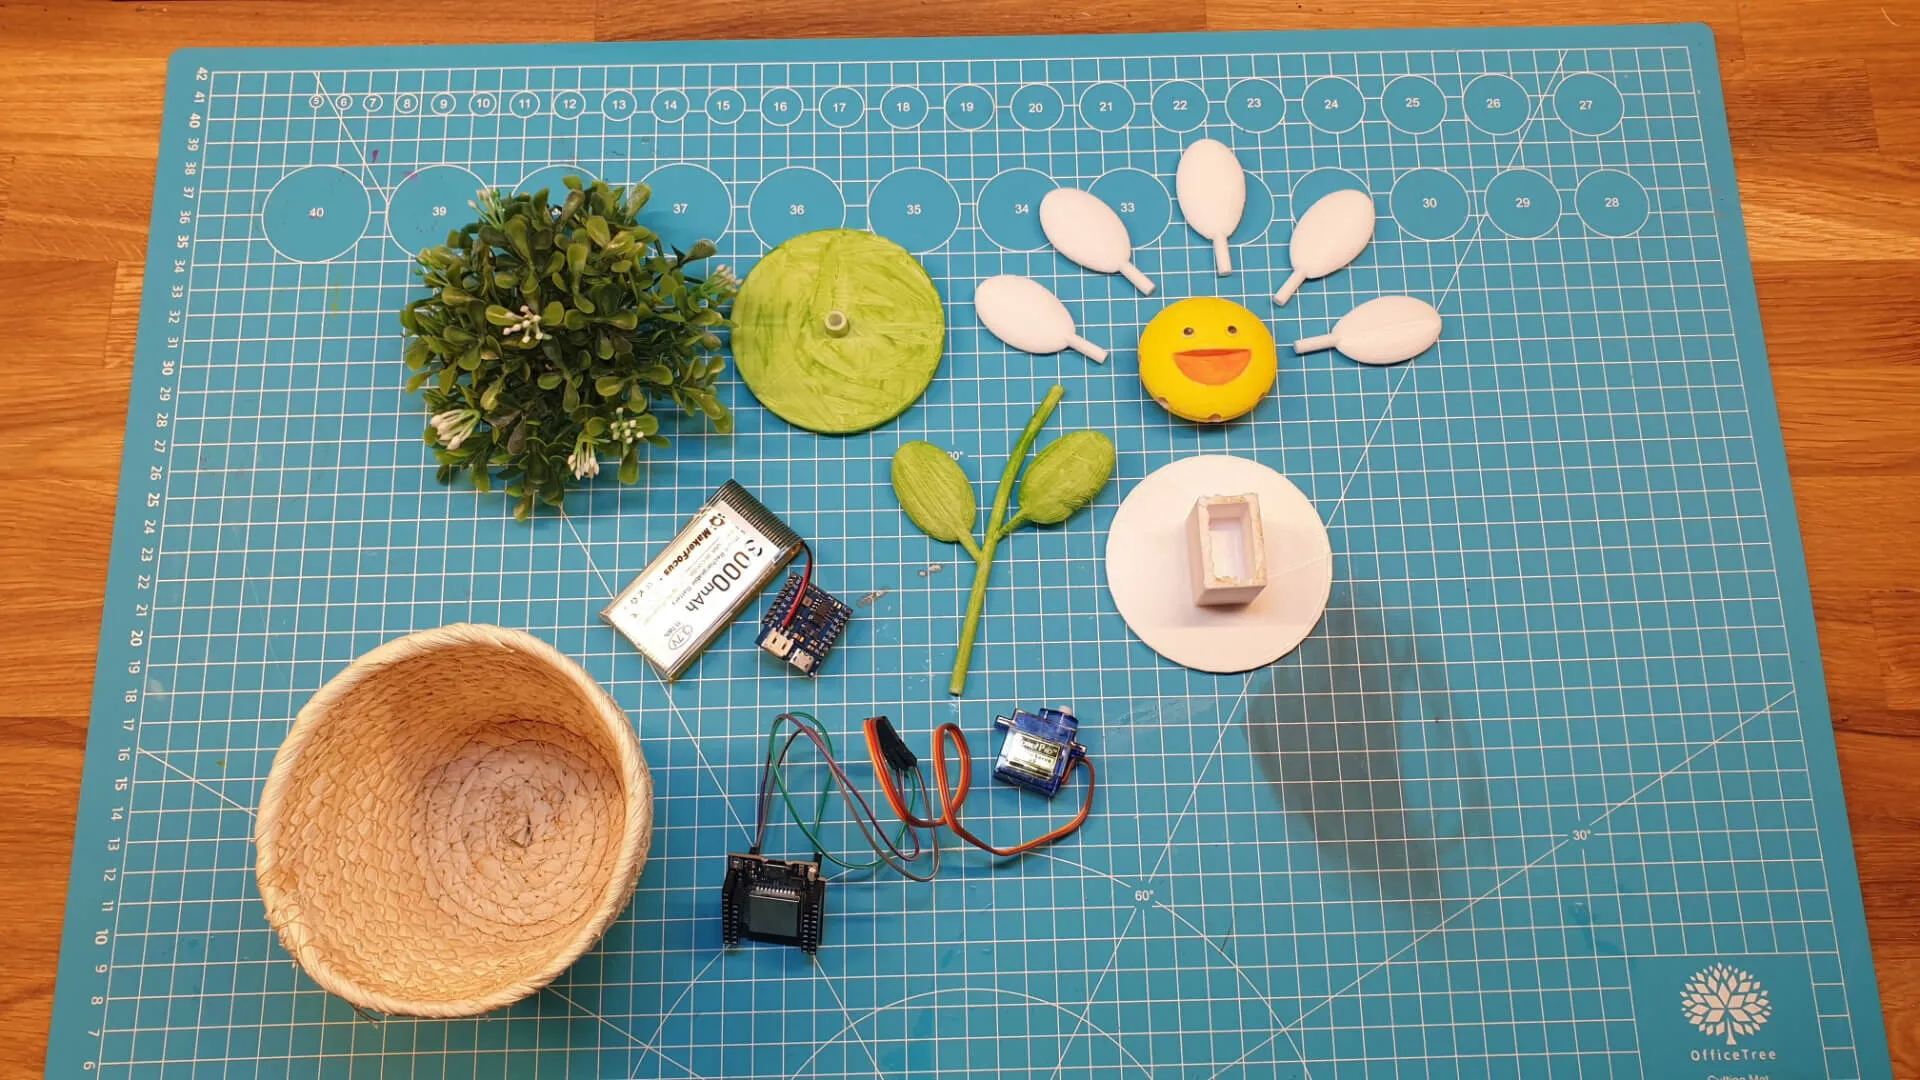 I painted the 3d printed flower, with questionable success.
Bill Of Materials
No affiliate links here, just an idea of prices. Buy locally if you can! I had most of the stuff lying around already, so I only spent around 5 EUR on the pot and fake plants.
| Part | Info | Where to get | Cost |
|---|---|---|---|
| ESP32 Mini | These have Wifi & Bluetooth onboard | Amazon | 11 EUR |
| ESP32 Mini Battery Shield | You’ll get three of them | Amazon | 9 EUR |
| 2000mA LiPo Battery | I used a spare one I already had | Amazon | 11 EUR |
| Servo Motor | You can get 3 for double the price | Amazon | 6 EUR |
| PLA Filament | I used white filament to paint it later | Amazon | 1 EUR |
| Flower Pot | Make sure it’s not conducting electricity | Flower Shop or Hardware Store | 3 EUR |
| Plastic Plant Decoration | Not needed but looks nice | Flower Shop or Hardware Store | 2 EUR |
| Acrylic Paint | Stolen from the kid’s room | The kid’s room | free |
| Total cost | 43 EUR |
Assembly
I did some small battery surgery first: removing the Mini-JST connector and soldering the cables onto the shield that used a standard JST connector. Not ideal, but I didn’t want to buy a separate battery.
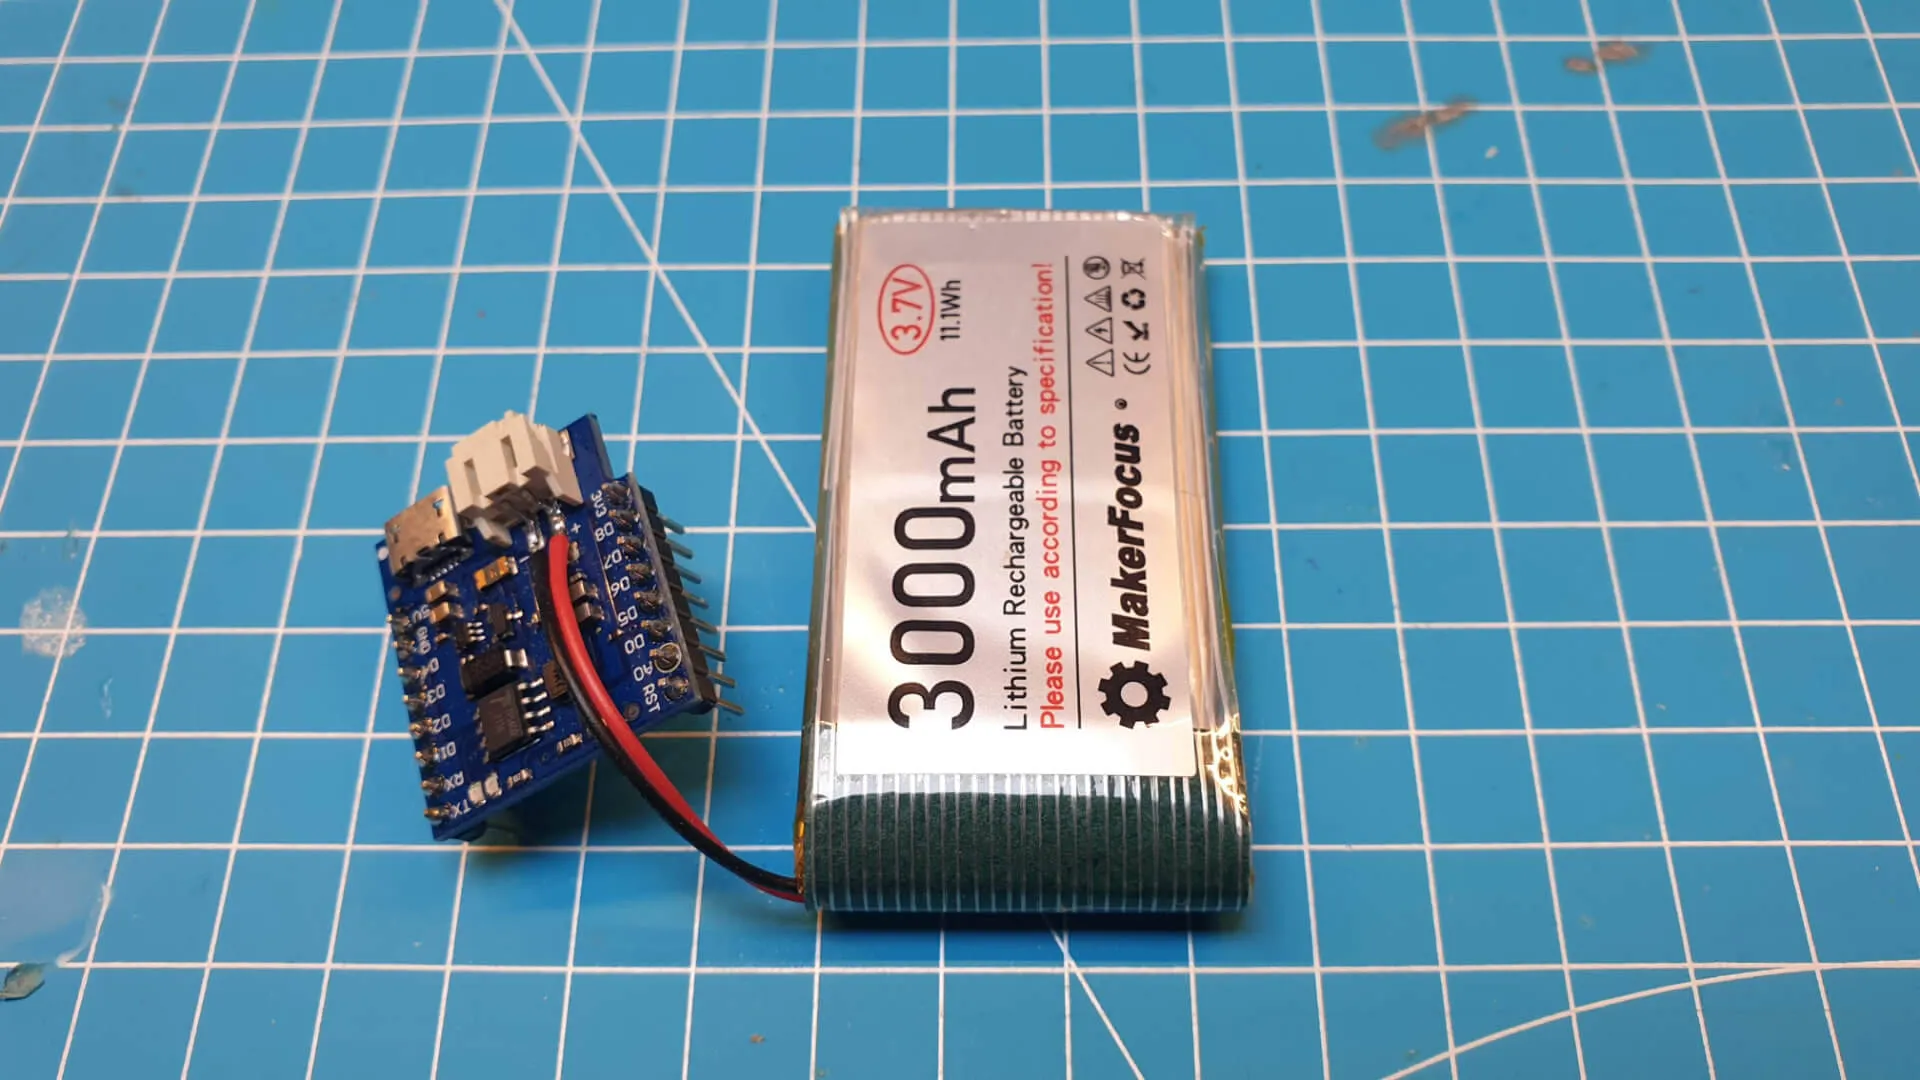 The solder connection is tiny and fragile, just like my self-confidence.
Next, I hooked up the ESP32 Mini to the servo motor. A 3.3V line and ground (GHD) supply the motor, while pin 21 on the ESP32 handles the control signal.
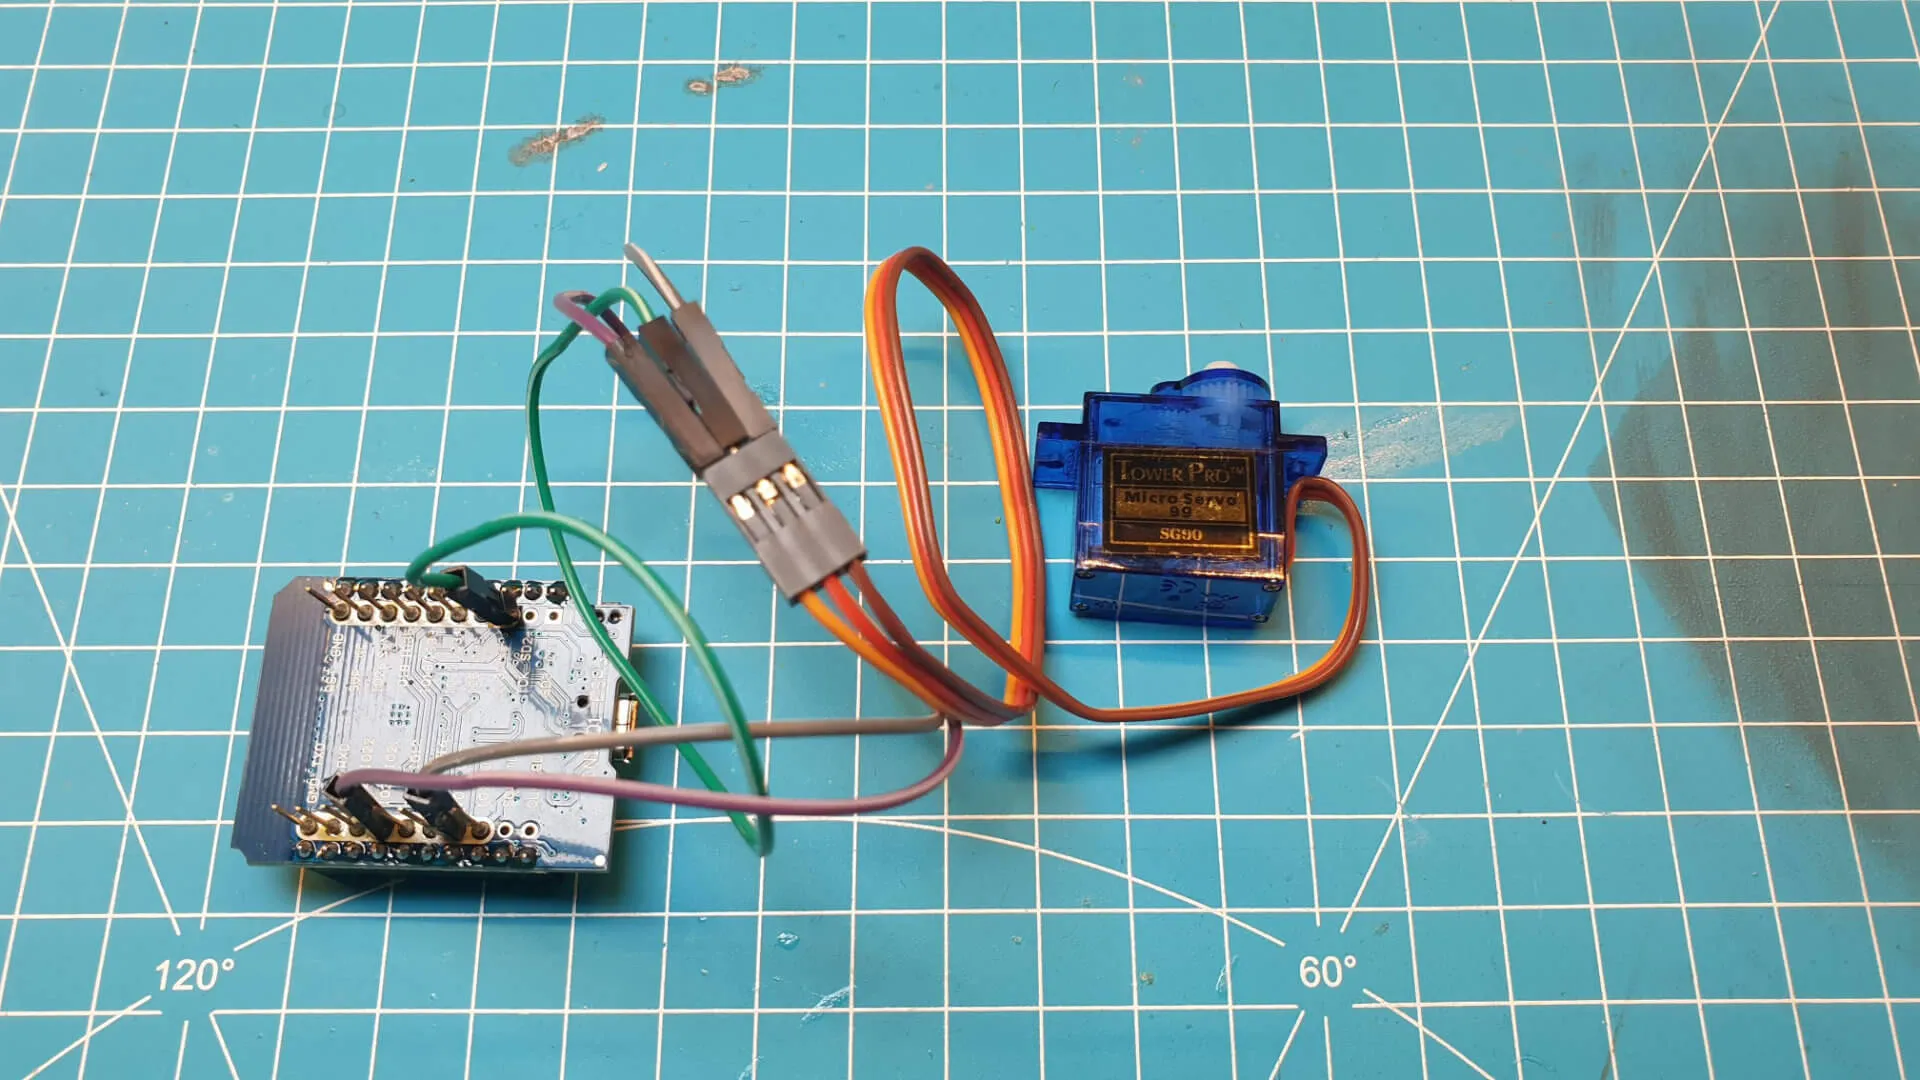 I always use jumper wires to test a connection first.
After double-checking, I soldered the cables directly to the ESP32 pins and bent them slightly inward to save space.
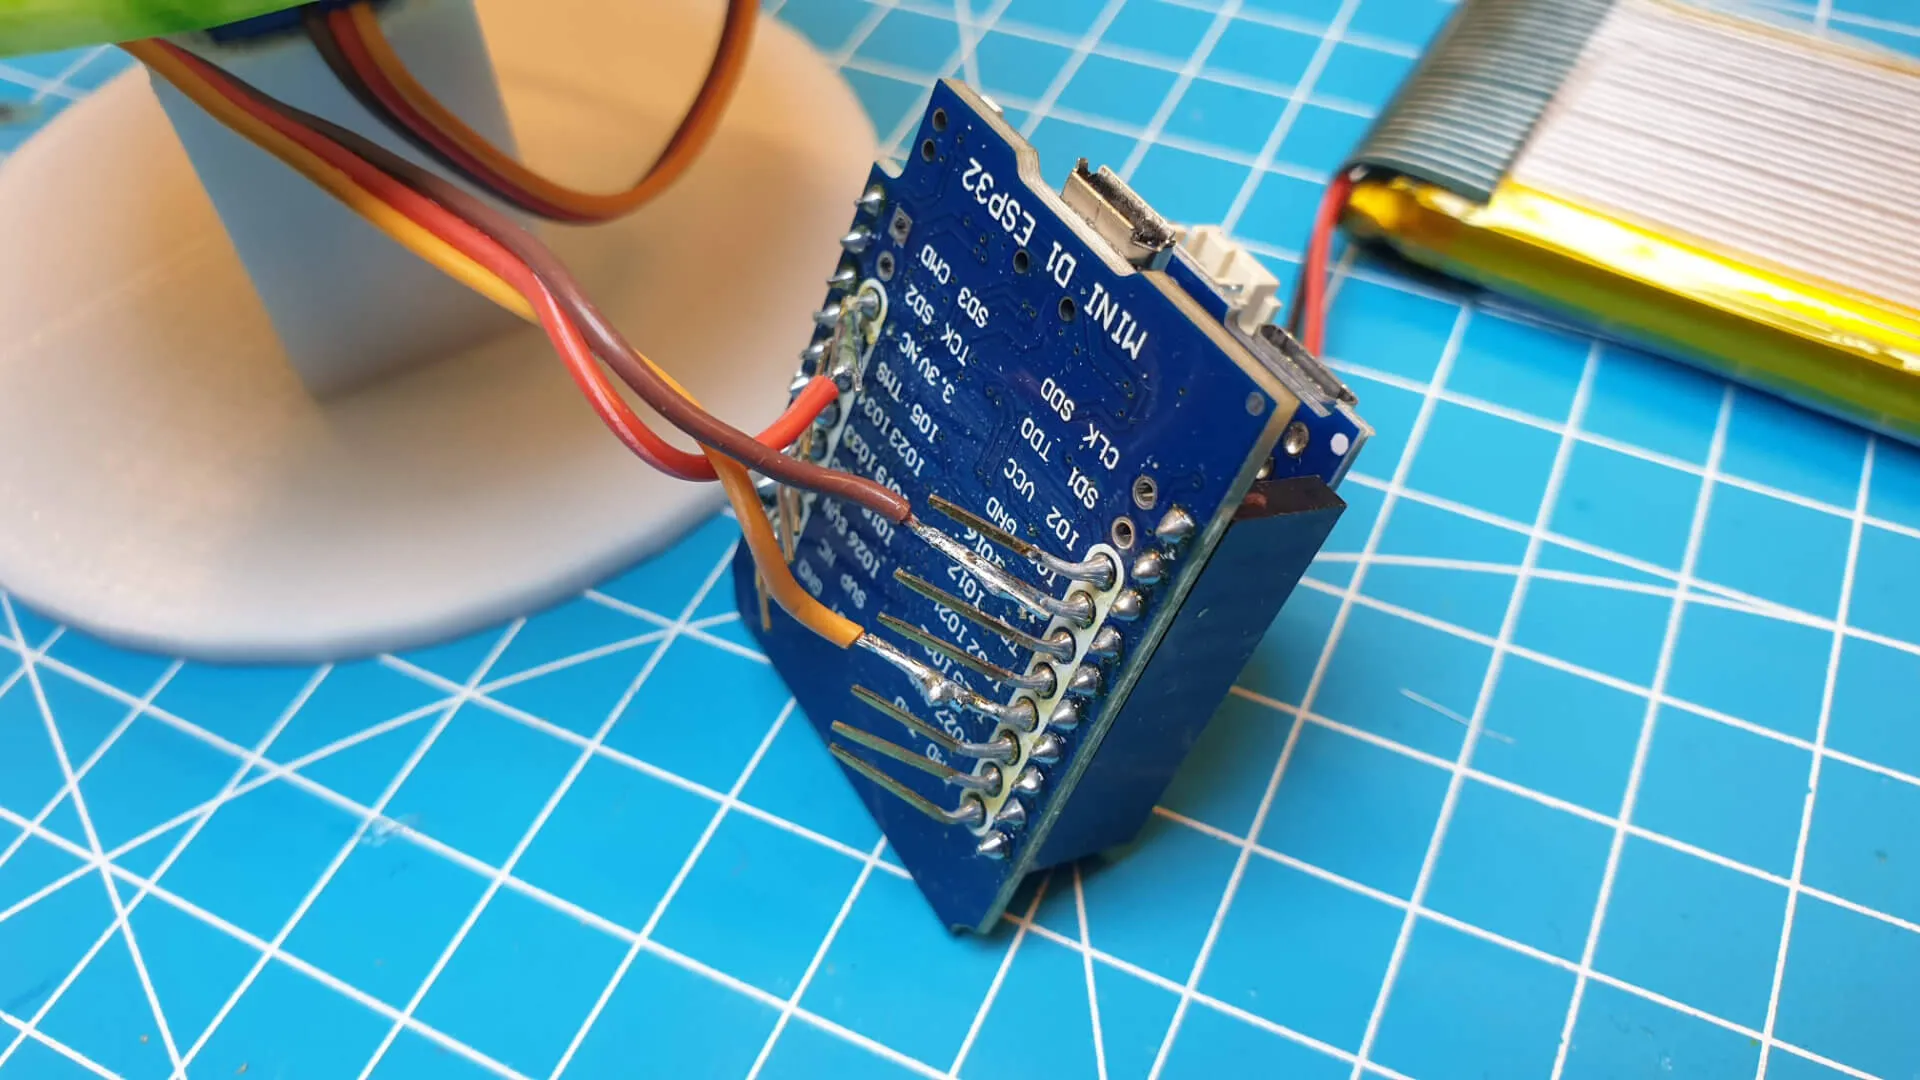 Make sure you solder all your projects, otherwise you likely disassemble them for the next one.
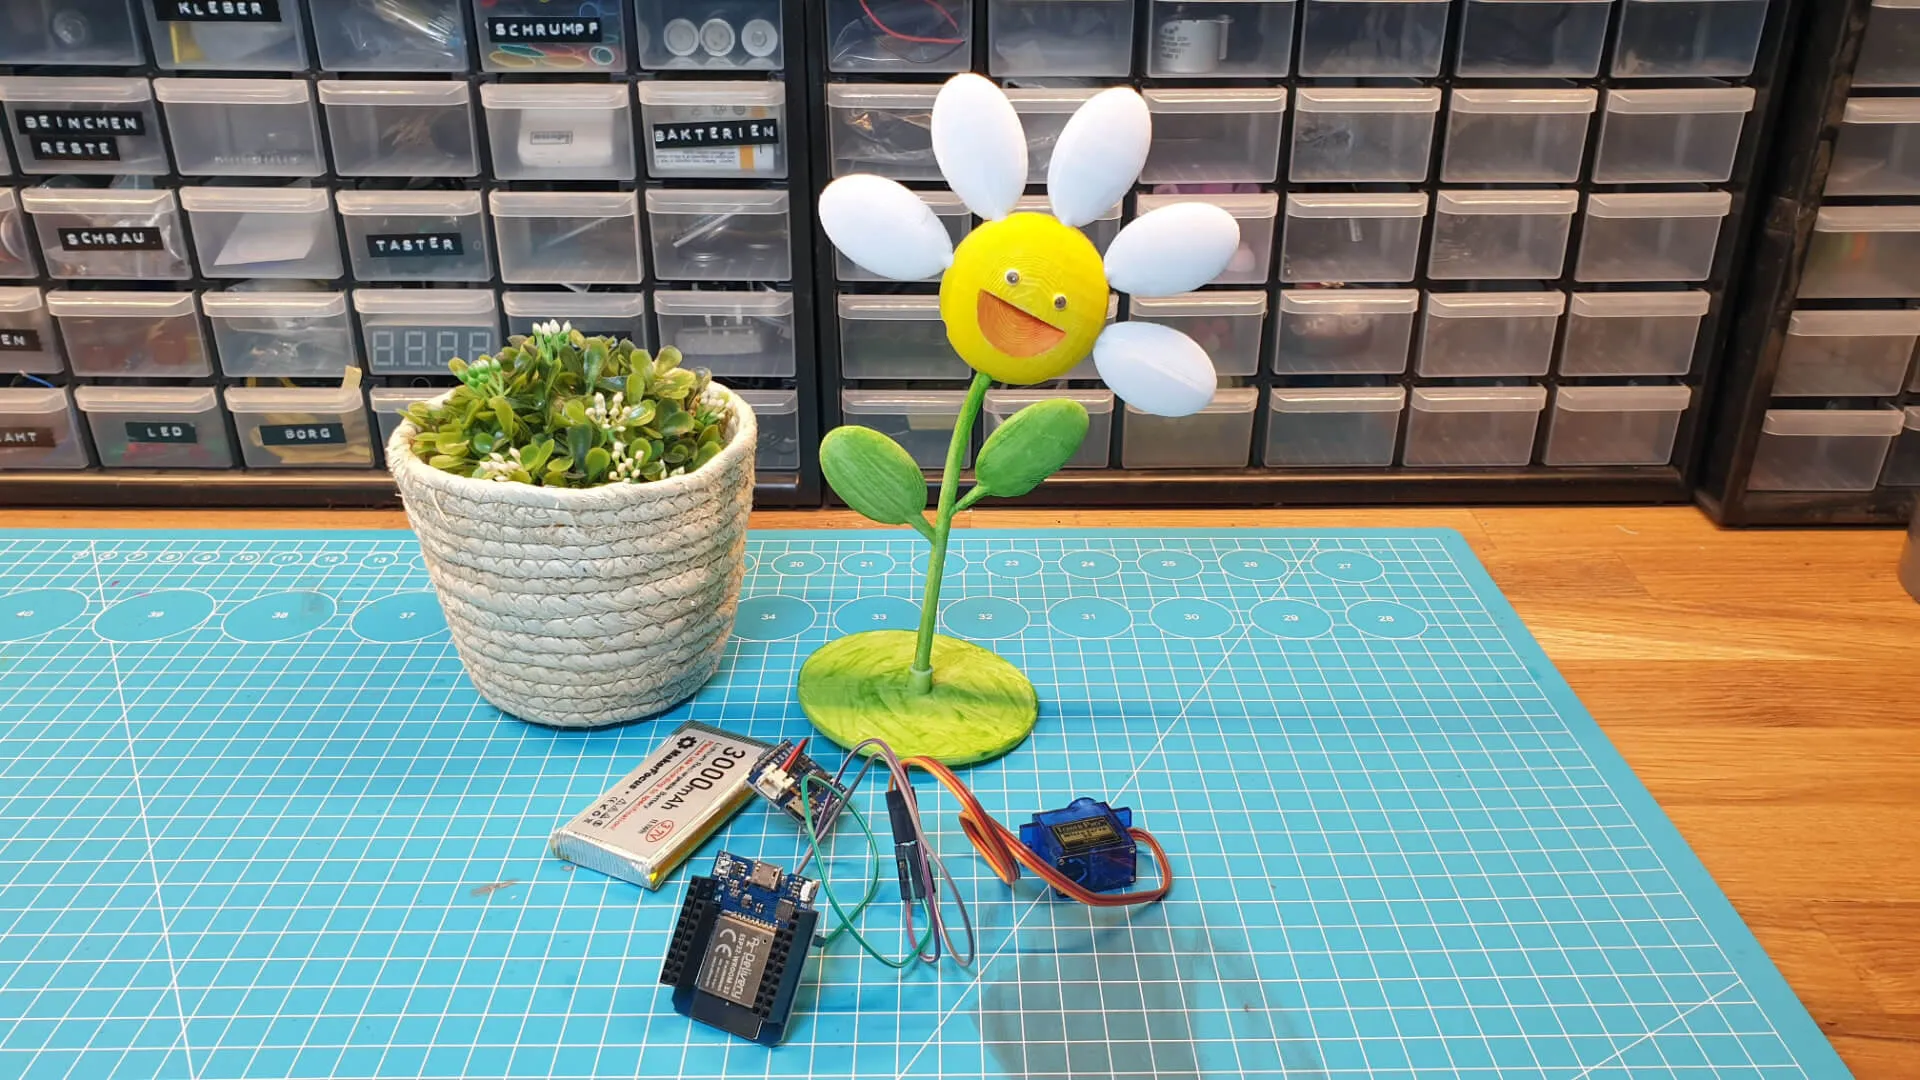 The assembled 3D printed flower and the electronics.
Then I nestled the motor in its 3D-printed cradle, taped the battery to the bottom, and squeezed the board and wires between the motor housing and the flowerpot. When the servo moves, the whole 3D-printed flower rotates in a rather dramatic flair.
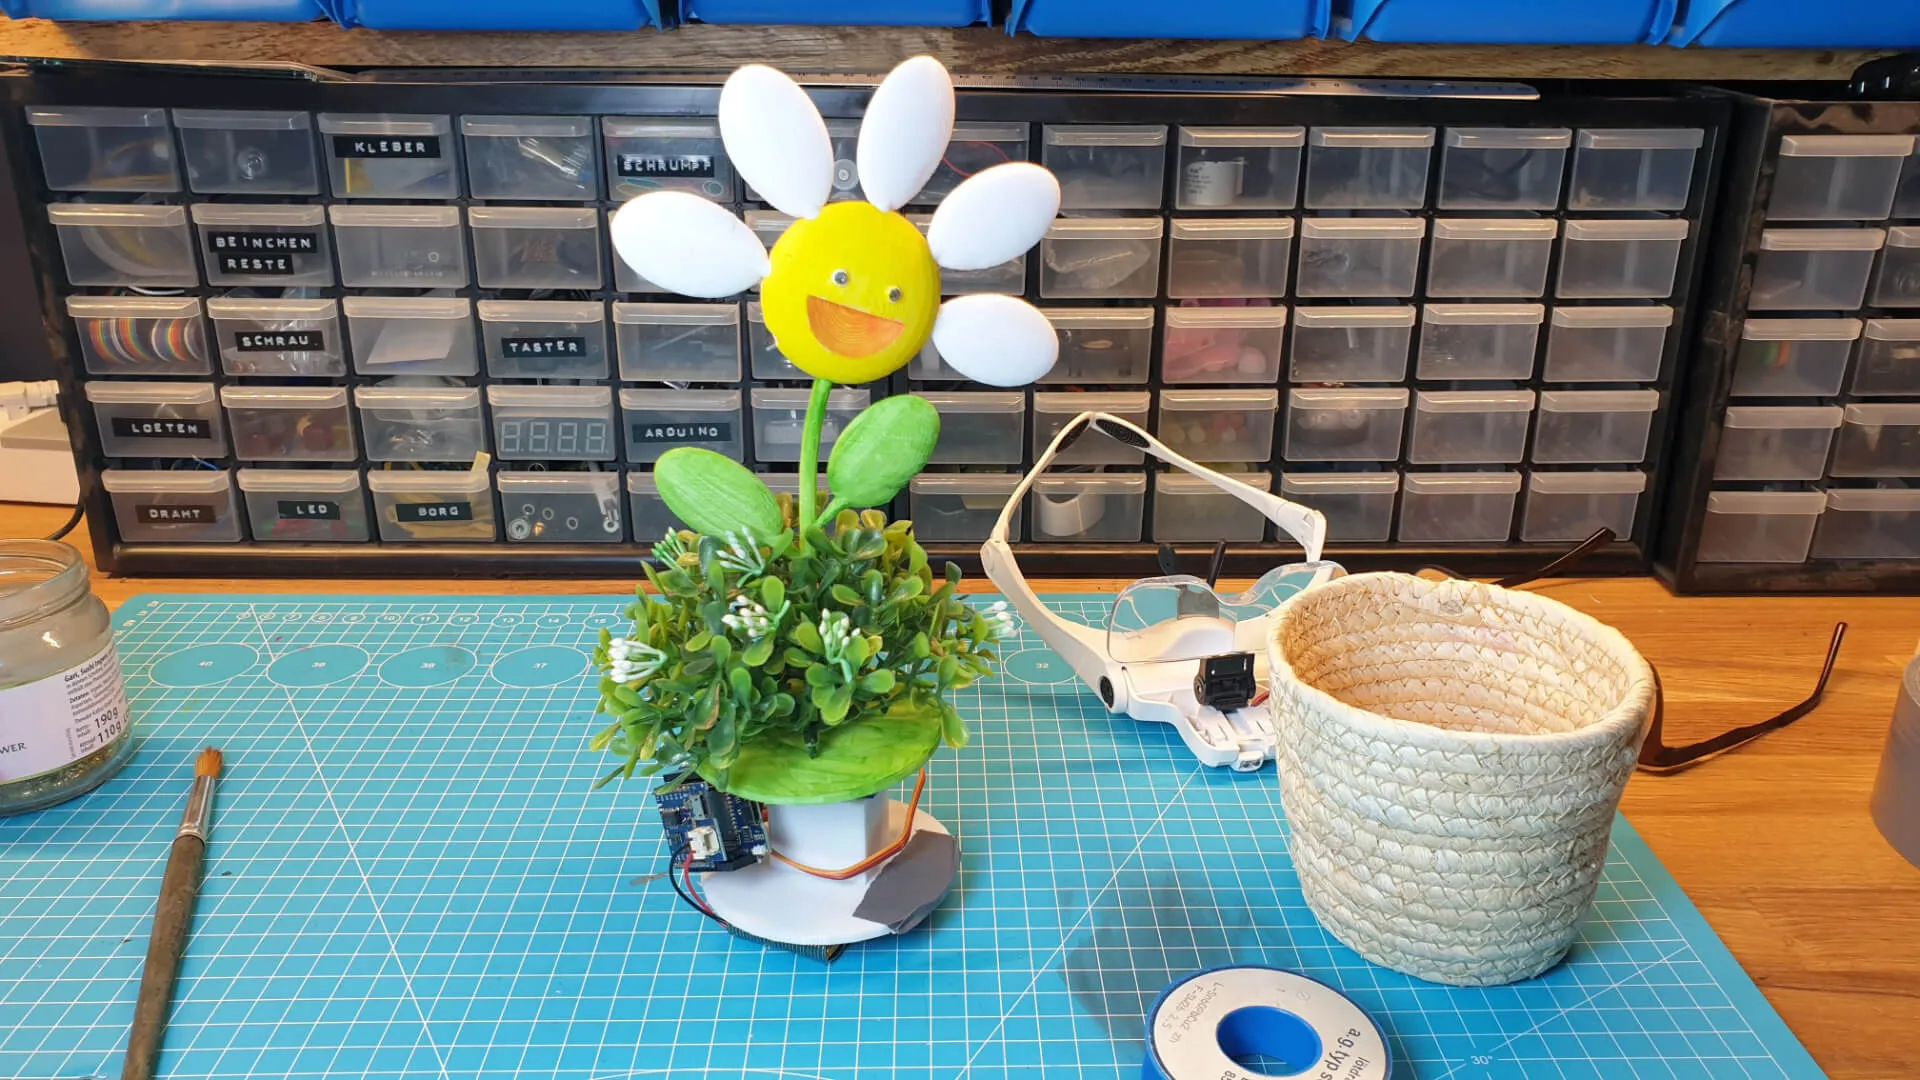 It’s super important that the motor can spin freely, still. Otherwise this would be a sad plant.
That’s it for the hardware. Time to write some code!
Calling the API
Home Assistant has a powerful API that exposes most connected devices and their data. For my battery, for example, the relevant endpoint is http://192.168.178.69:8123/api/states/sensor.s10x_state_of_charge.
That makes it super easy to query the data, as a quick curl command in the terminal can confirm:
curl \
-H "Authorization: Bearer eyJhbGciOiJIUzI1NiIsInR5cCI6IkpXVCJ9.eyJpc3MiOiJhOTNiNzI3N2U3Mzc0YTIzODA2OTYwZmQ4ZmQ3MzQ3YSIsImlhdCI6MTcxMTcxNzcxOCwiZXhwIjoyMDI3MDc3NzE4fQ.UoSOlMJO64vPc9iJtbOecwPE1dweVMoKwPLdWV9L3m0" \
-H "Content-Type: application/json" \
http://192.168.178.69:8123/api/states/sensor.s10x_state_of_charge
Home Assistant returns a JSON string with the battery’s state indicating its charge level.
{
"entity_id": "sensor.s10x_state_of_charge",
"state": "0",
"attributes": {
"state_class": "measurement",
"unit_of_measurement": "%",
"device_class": "battery",
"friendly_name": "S10X State of charge"
},
"last_changed": "2024-12-23T15:34:39.260849+00:00",
"last_reported": "2024-12-26T13:57:35.276359+00:00",
"last_updated": "2024-12-23T15:34:39.260849+00:00",
"context": {
"id": "01JFT2FWWWVYSN902EP54A97XJ",
"parent_id": null,
"user_id": null
}
}
The Code
For smaller projects with just one file, I prefer the free Arduino IDE. It’s less hassle compared to wrangling libraries and board settings in something like VSCode with PlatformIO.
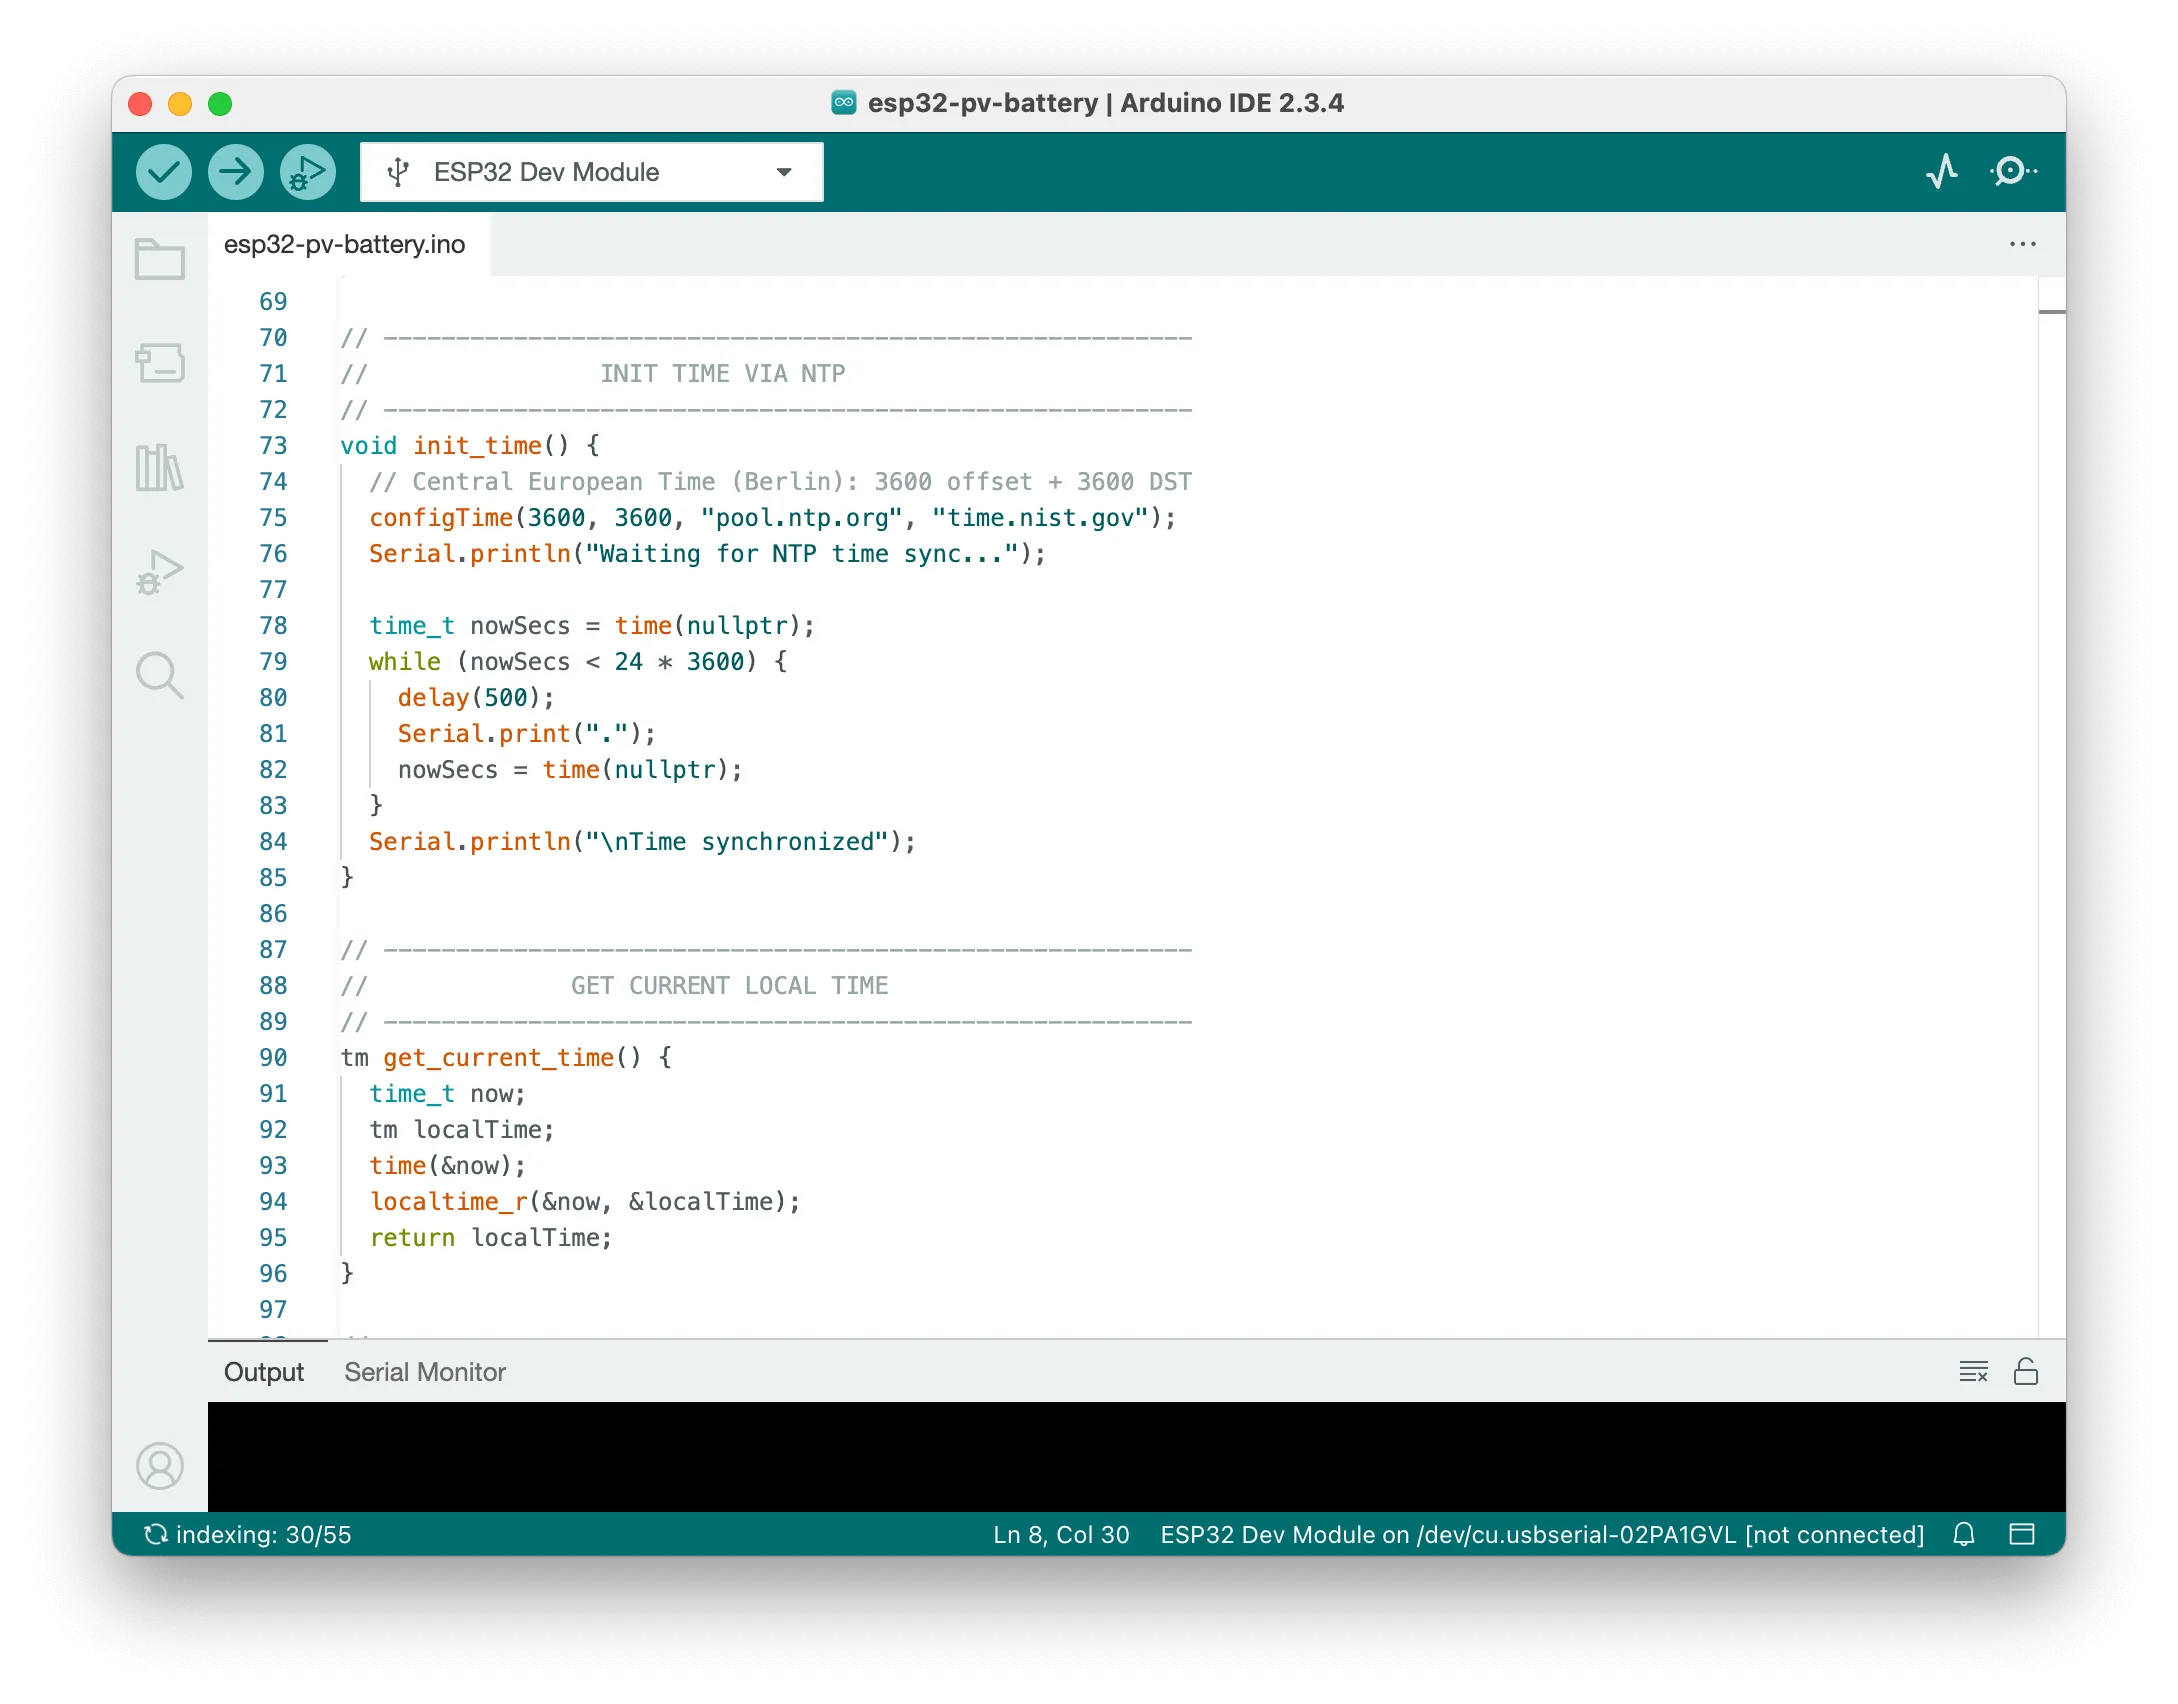 The Arduino IDE is perfect for small projects, but don’t expect the features of a full IDE.
Basic program flow:
- Run some setup tasks (like reducing CPU frequency to save power).
- Connect to Wi-Fi.
- Get the current time from an NTP server (the ESP32 doesn’t have a built-in clock).
- If it’s night (midnight to 6 AM), go back to sleep.
- Query the battery state from the API.
- Map the state (0–100) to a rotation angle (0–180).
- Move the servo motor.
- Go to sleep.
This entire loop repeats every 20 minutes. The actual code for making the API call and telling the servo to move is pretty short:
// --------------------------------------------------------
// GET SENSOR DATA (HTTP GET)
// --------------------------------------------------------
int get_sensor_data() {
float state = -1;
if (WiFi.status() == WL_CONNECTED) {
http.begin(wifiClient, apiEndpoint);
http.addHeader("Authorization", authorizationHeader);
http.addHeader("Content-Type", "application/json");
int httpCode = http.GET();
if (httpCode > 0) {
String payload = http.getString();
DynamicJsonDocument doc(1024);
DeserializationError error = deserializeJson(doc, payload);
if (!error) {
state = doc["state"].as<float>();
} else {
Serial.println("Failed to parse JSON");
}
} else {
Serial.println("Error in HTTP request");
}
http.end();
}
return state;
}
And the main code inside the loop() function:
// --------------------------------------------------------
// LOOP
// --------------------------------------------------------
void loop() {
[..]
// Get battery state from API or use random for testing
int battery_state = get_sensor_data();
if (battery_state == -1) {
Serial.println("API request failed, going to sleep...");
go_to_sleep();
}
int servo_rotation = map(battery_state, 0, 100, 0, 180);
myservo.attach(SERVO_PIN);
myservo.write(servo_rotation);
[..]
}
Most lines are about Wi-Fi setup or fetching the time. Checking the hour is optional, but since my 3D plant lives in the living room (where my dog also sleeps), I didn’t want it buzzing to life every 20 minutes overnight. Also, skipping those 18 or so nightly updates further trims power use.
Here’s the full code, which is also available on my GitHub account.
#include <Arduino.h>
#include <WiFi.h>
#include <HTTPClient.h>
#include <ArduinoJson.h>
#include <ESP32Servo.h>
// -------------------- DEFINES & CONSTANTS --------------------
#define LED_BUILTIN 2
#define SERVO_PIN 21
#define DEEP_SLEEP_MINUTE 60000000
#define DEEP_SLEEP_TIME (DEEP_SLEEP_MINUTE * 20)
#define DEEP_SLEEP_TIME_TEST 4000000
// Wi-Fi credentials
const char* ssid = "[enter your SSID]]";
const char* password = "[enter your password]";
// API endpoint and authentication
const char* apiEndpoint = "http://192.168.178.69:8123/api/states/sensor.s10x_state_of_charge";
const char* authorizationHeader =
"Bearer [your bearer code]";
// Test mode flag
const bool testmode = false;
// -------------------- GLOBAL OBJECTS --------------------
WiFiClient wifiClient;
HTTPClient http;
Servo myservo;
// --------------------------------------------------------
// SETUP
// --------------------------------------------------------
void setup() {
setCpuFrequencyMhz(80);
Serial.begin(9600);
pinMode(LED_BUILTIN, OUTPUT);
digitalWrite(LED_BUILTIN, LOW);
connect_to_wifi();
}
// --------------------------------------------------------
// CONNECT TO WIFI FUNCTION
// --------------------------------------------------------
void connect_to_wifi() {
int attempts = 0;
Serial.println("Connecting to WiFi...");
WiFi.begin(ssid, password);
// Limit the connection attempts to 10 with exponential backoff
while (WiFi.status() != WL_CONNECTED && attempts < 10) {
delay(500 * (1 << attempts)); // 500ms, 1s, 2s, 4s...
digitalWrite(LED_BUILTIN, !digitalRead(LED_BUILTIN)); // Toggle LED
attempts++;
}
digitalWrite(LED_BUILTIN, LOW); // Turn off LED after connection attempt
if (WiFi.status() == WL_CONNECTED) {
Serial.println("\nConnected to WiFi");
} else {
Serial.println("\nFailed to connect to WiFi");
go_to_sleep();
}
}
// --------------------------------------------------------
// INIT TIME VIA NTP
// --------------------------------------------------------
void init_time() {
// Central European Time (Berlin): 3600 offset + 3600 DST
configTime(3600, 3600, "pool.ntp.org", "time.nist.gov");
Serial.println("Waiting for NTP time sync...");
time_t nowSecs = time(nullptr);
while (nowSecs < 24 * 3600) {
delay(500);
Serial.print(".");
nowSecs = time(nullptr);
}
Serial.println("\nTime synchronized");
}
// --------------------------------------------------------
// GET CURRENT LOCAL TIME
// --------------------------------------------------------
tm get_current_time() {
time_t now;
tm localTime;
time(&now);
localtime_r(&now, &localTime);
return localTime;
}
// --------------------------------------------------------
// GET SENSOR DATA (HTTP GET)
// --------------------------------------------------------
int get_sensor_data() {
float state = -1;
if (WiFi.status() == WL_CONNECTED) {
http.begin(wifiClient, apiEndpoint);
http.addHeader("Authorization", authorizationHeader);
http.addHeader("Content-Type", "application/json");
int httpCode = http.GET();
if (httpCode > 0) {
String payload = http.getString();
DynamicJsonDocument doc(1024);
DeserializationError error = deserializeJson(doc, payload);
if (!error) {
state = doc["state"].as<float>();
} else {
Serial.println("Failed to parse JSON");
}
} else {
Serial.println("Error in HTTP request");
}
http.end();
}
return state;
}
// --------------------------------------------------------
// GO TO DEEP SLEEP
// --------------------------------------------------------
void go_to_sleep() {
myservo.detach(); // Detach servo to save power
WiFi.disconnect(true); // Disconnect WiFi to save power
WiFi.mode(WIFI_OFF); // Turn off WiFi module
Serial.println("Servo off, WiFi off, going to sleep.");
delay(500);
Serial.end();
delay(2000);
if (testmode) {
esp_sleep_enable_timer_wakeup(DEEP_SLEEP_TIME_TEST);
} else {
esp_sleep_enable_timer_wakeup(DEEP_SLEEP_TIME);
}
esp_deep_sleep_start();
}
// --------------------------------------------------------
// LOOP
// --------------------------------------------------------
void loop() {
// Initialize time via NTP
init_time();
// Get current local time
tm currentTime = get_current_time();
Serial.print("Hour: ");
Serial.println(currentTime.tm_hour);
// If it's night time (0:00 - 6:00), go to sleep
if (currentTime.tm_hour < 6) {
Serial.println("It's night time, going to sleep...");
go_to_sleep();
}
// Get battery state from API or use random for testing
int battery_state = (testmode) ? random(0, 100) : get_sensor_data();
if (battery_state == -1) {
Serial.println("API request failed, going to sleep...");
go_to_sleep();
}
int servo_rotation = map(battery_state, 0, 100, 0, 180);
// Print debug info
Serial.print("Battery: ");
Serial.println(battery_state);
Serial.print("Servo Rotation: ");
Serial.println(servo_rotation);
// Move the servo
myservo.attach(SERVO_PIN);
myservo.write(servo_rotation);
delay(1000);
// Sleep
go_to_sleep();
}
Final Thoughts
I’m pretty happy with how this project turned out. One battery charge lasts around two weeks—not quite the holy grail, but still a neat conversation piece whenever guests spot a rotating flower that’s apparently powered by sunshine. It’s mostly showing its “sleepy” face these days in winter, so I finally turned it around so we can enjoy that sunny smile.
If I were to take this further, I’d use an even lighter flower design so it’d draw less power during rotation. I’d also consider adding a USB micro port extender to the battery shield, so I could charge it easily without fishing out the hardware from the pot every time.
And that’s all, folks. Thanks for reading! Stay sunny. 🌻
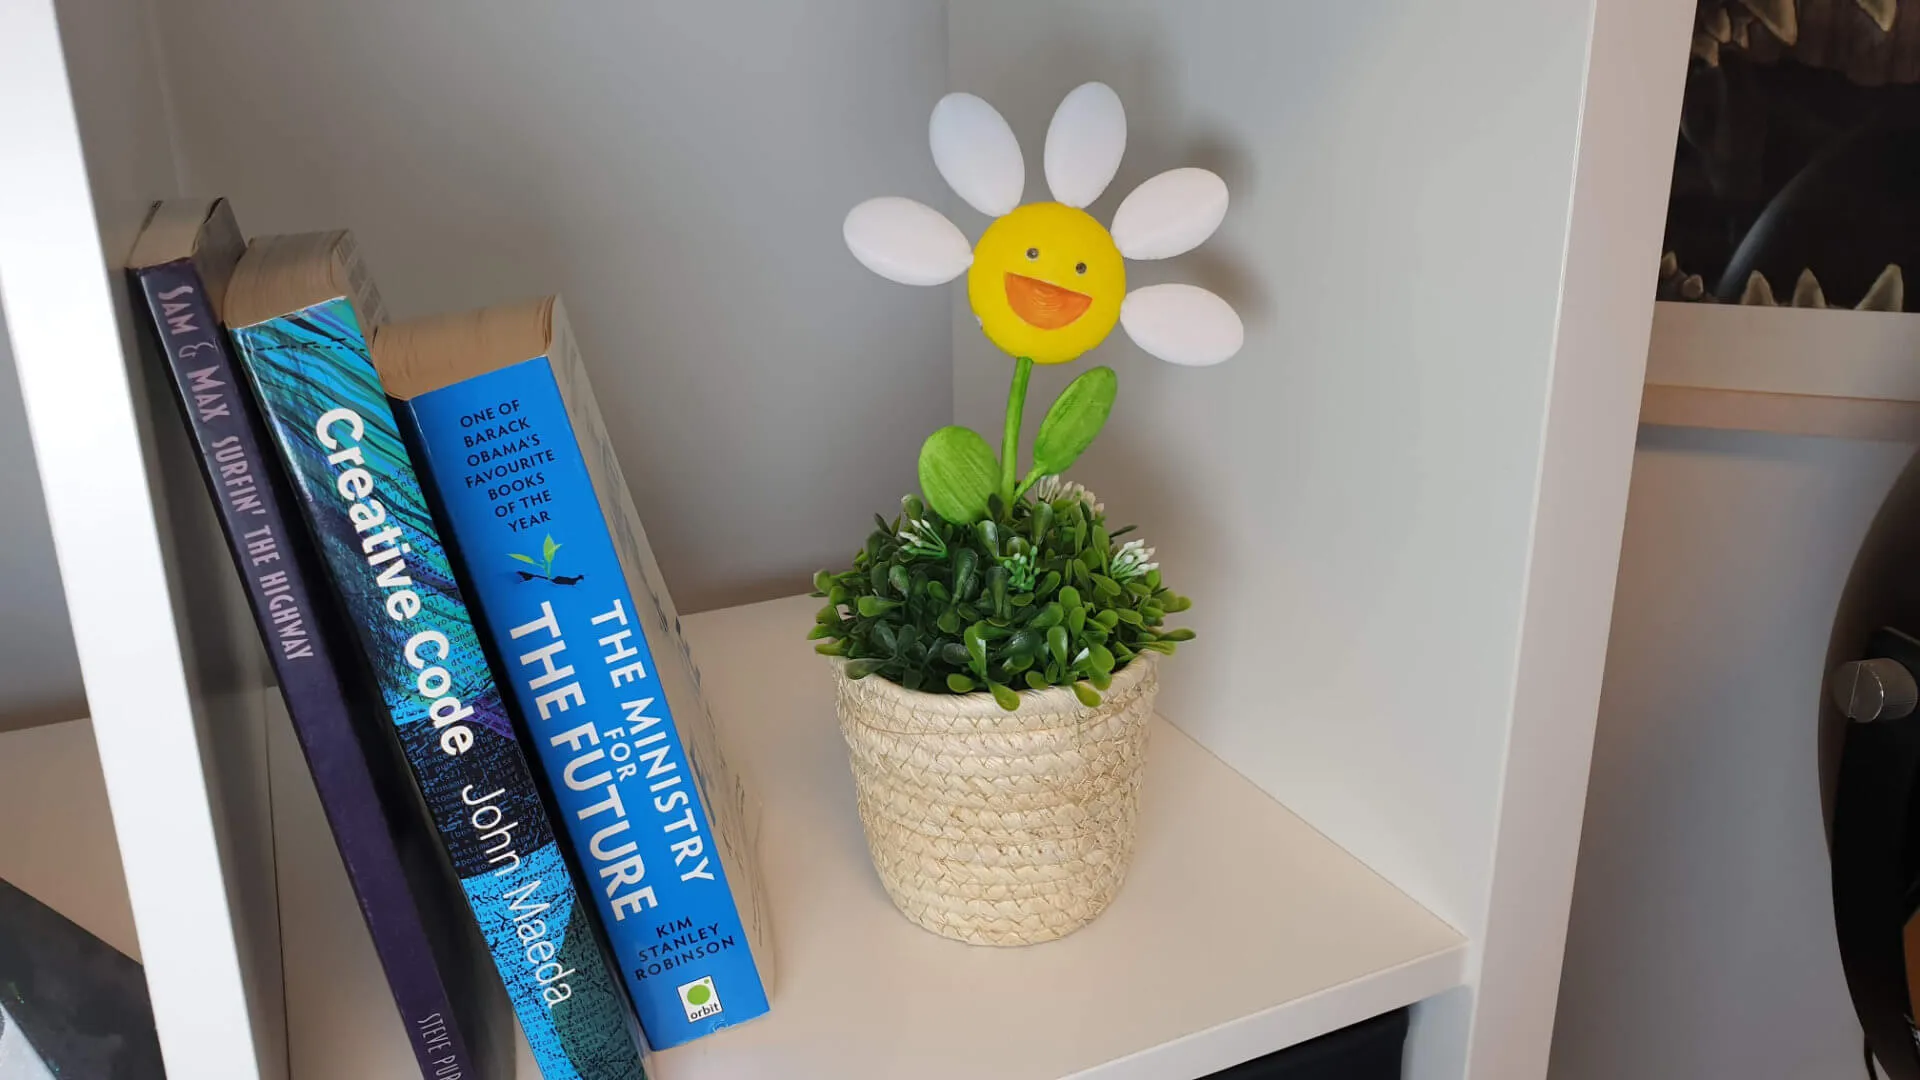 Happy Flower is happy!
